Appearance
Menus
Module: Menus Where to find it: Inside a site → site menu (the apps grid icon) → Menus. Scope: Per site and per environment — pick the environment at the top of the list before working. Who should read this: Administrators who build the navigation structures (top navigation, footer menus, sidebars, etc.) that are placed on pages, layouts, and shared elements.
1. Overview
A Menu is a reusable, ordered, hierarchical list of links — your site's navigation. You build a menu once here, then drop it onto pages, layouts, or shared elements wherever navigation is needed.
Each menu has a name (a reference name like "Top Navigation") and a tree of menu items. Every item has:
- a title (typed in, or pulled from a Localization keyword),
- a destination (where it links to), and
- an optional set of query parameters appended to the link.
Items can be nested (parent → children) to any depth and reordered by drag‑and‑drop, and each item can be published/unpublished individually.
Menus are environment‑scoped — a menu built under Development is separate from Production and promotes between environments through the Sync Manager, like other site content.
2. Prerequisites
- The pages you intend to link to should already exist in this environment (for Page destinations).
- For localized titles, the relevant Localization keywords should exist (see the Localization guide).
- Menus use the menus privilege group:
| Action | Privilege |
|---|---|
| View menus | Can View Menus (CVM) |
| Add a menu | Can Add Menus (CAM) |
| Edit a menu | Can Edit Menus (CEM) |
| Delete a menu | Can Delete Menus (CDM) |
3. The Menus list
Open Menus. Pick the environment tab at the top, then use the Available / Deleted tabs, the search box, and Create Menu.
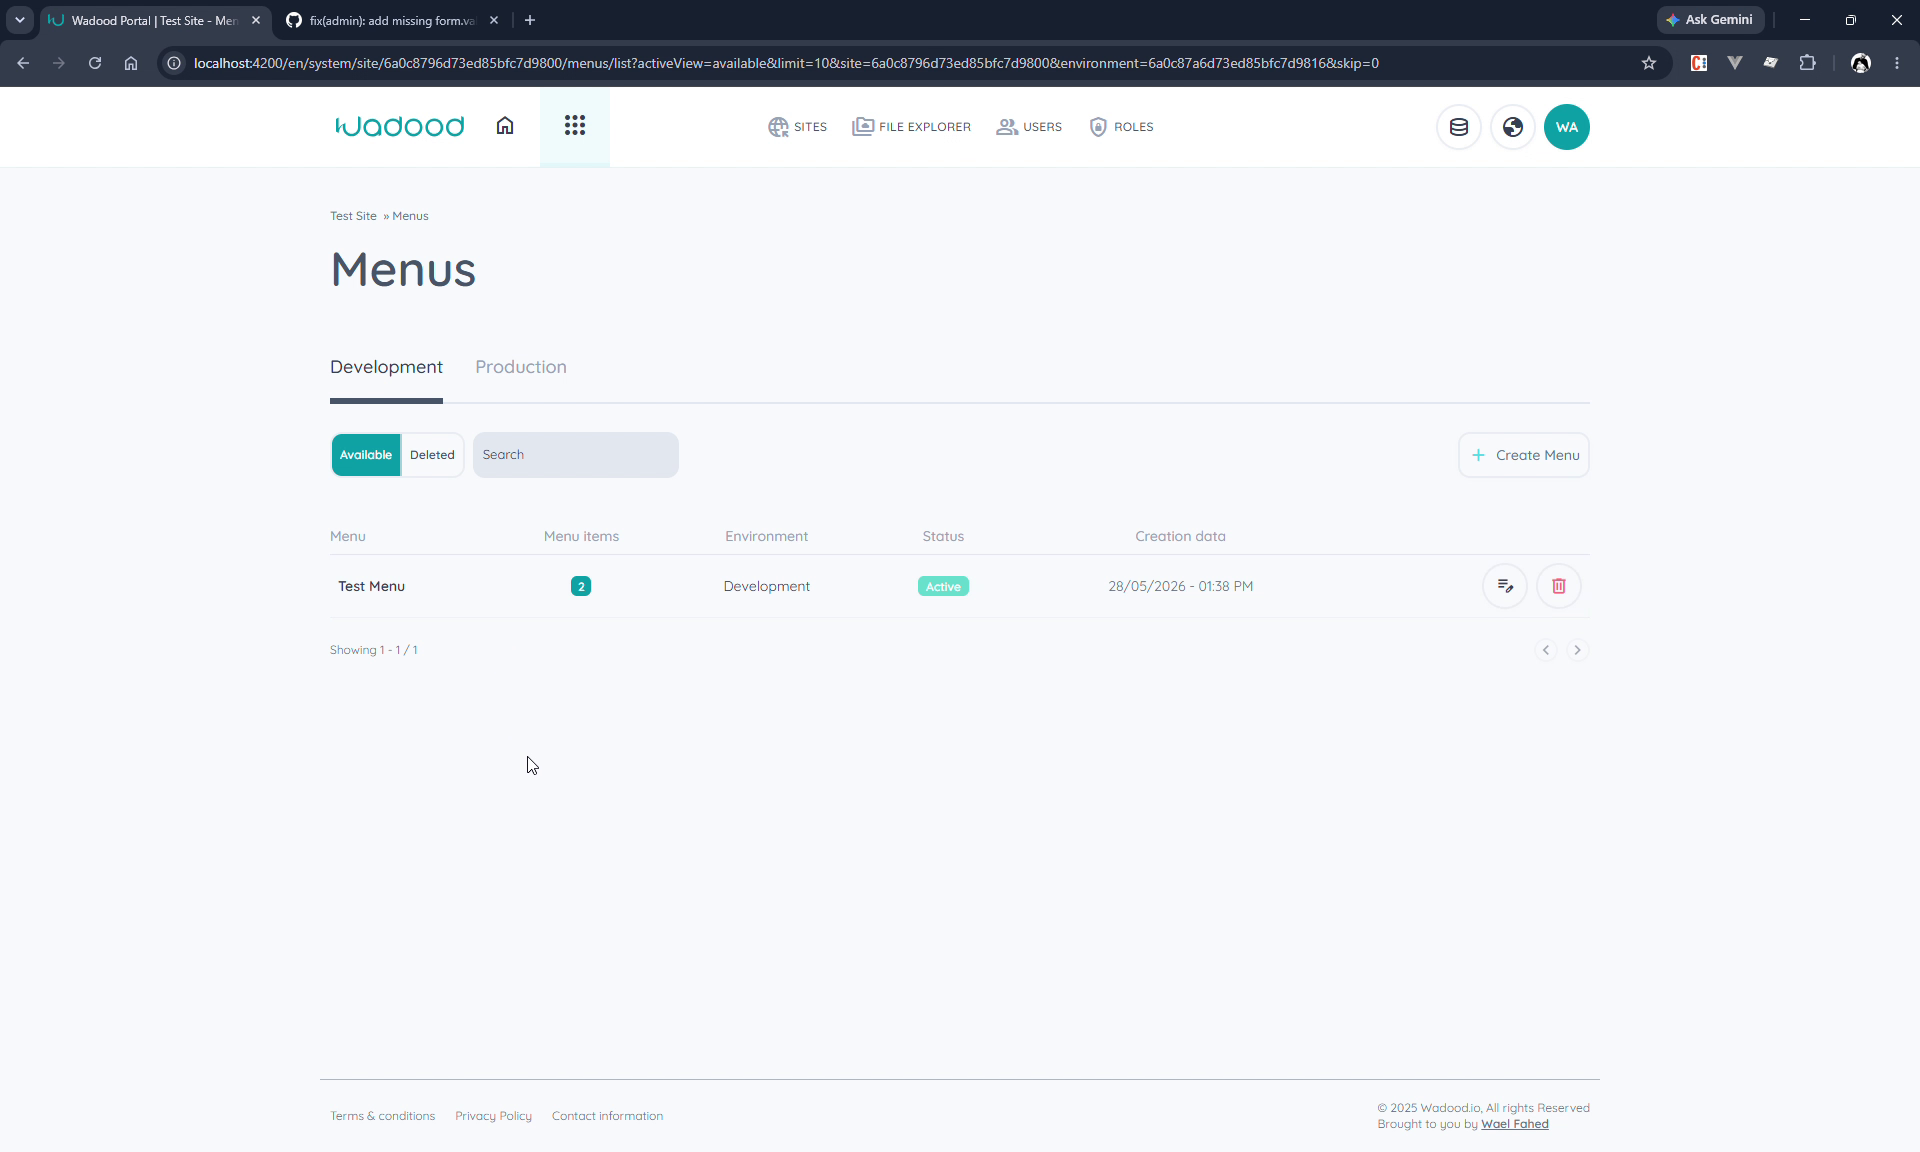
The table shows each menu's name, its number of menu items, the environment, its status (Active), and the creation date, with edit and delete actions.
4. Creating a menu
Click Create Menu. Give the menu a name (e.g. "Top Navigation") — this is a reference name for administrators, not shown to visitors. Then build the item tree.
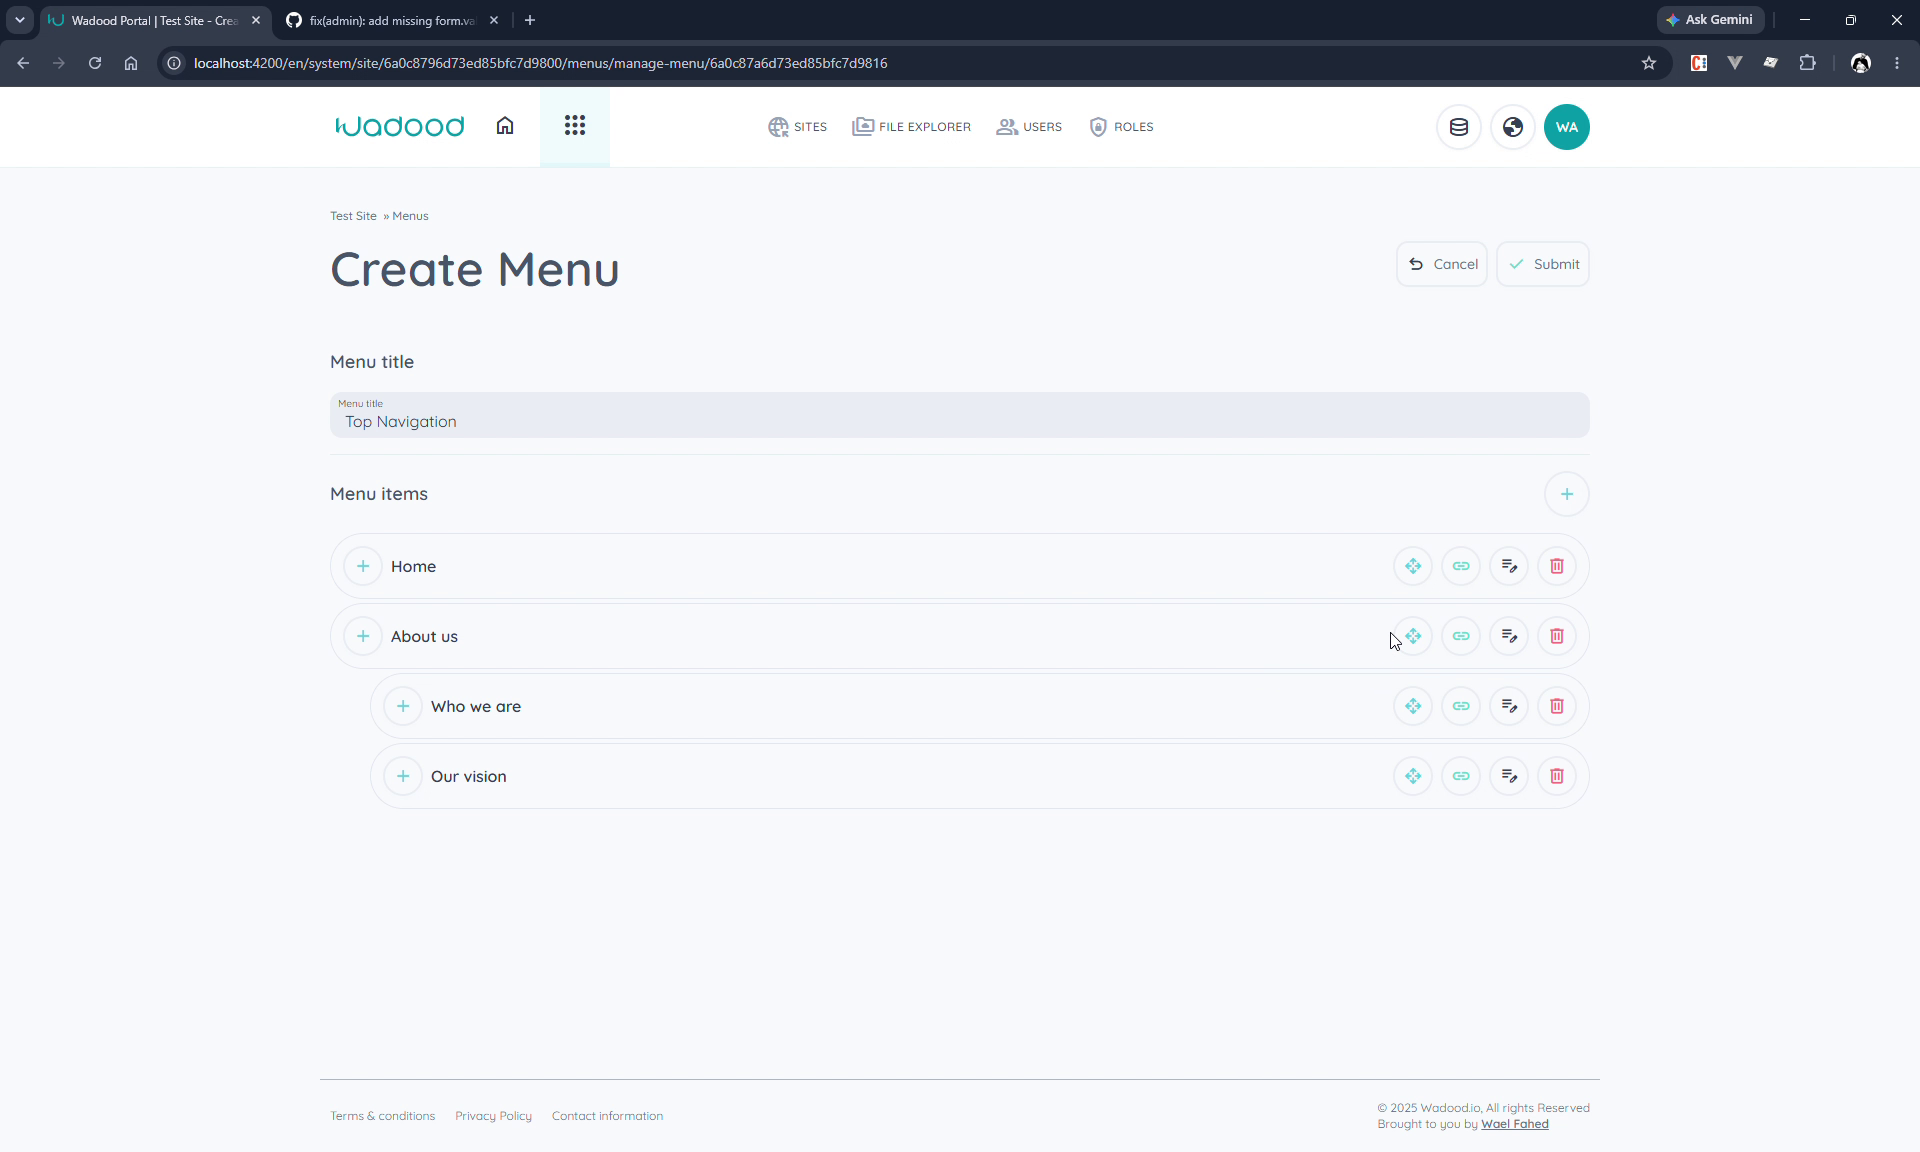
Add items with the + button at the top of Menu items. Each row offers:
| Control | What it does |
|---|---|
| + (on the row) | Add a child item under this item (it becomes the parent). |
| Move handle | Drag to reorder / re‑nest (see §6). |
| Publish toggle (link / link‑off) | Publish or unpublish the item without deleting it. Unpublished items don't render on the site. |
| Edit | Re‑open the item editor. |
| Delete | Remove the item from the menu. |
Click Submit (top‑right) to save the whole menu.
Two ways to add a child: use the + at the top of Menu items to add a root item, or the + on an item's row to add an item nested inside that item. (You can also set the parent explicitly in the editor — see below.)
5. The menu‑item editor
Adding or editing an item opens the item dialog.
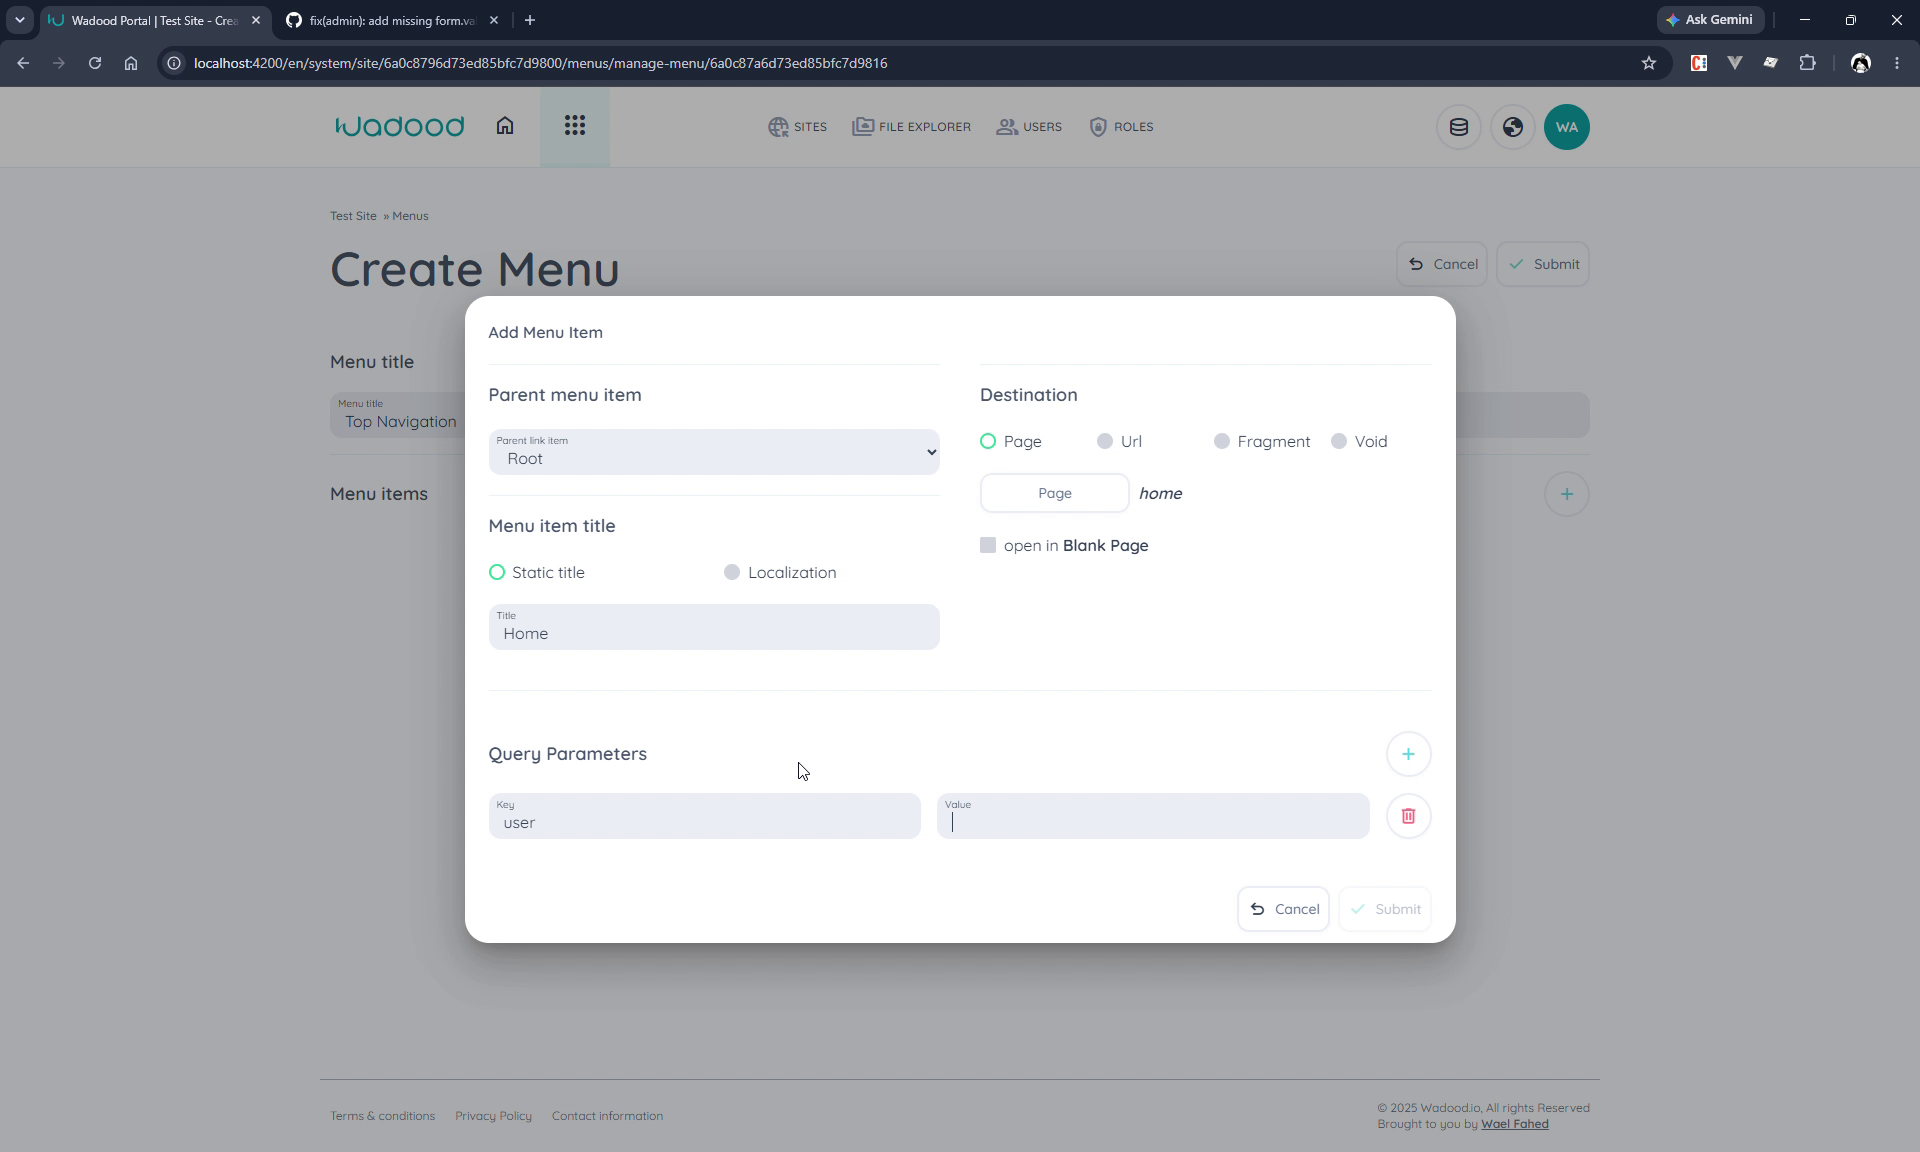
It has four parts:
5.1 Parent menu item
Choose Root (a top‑level item, nothing above it) or pick another item to nest this one inside it. This controls the item's place in the hierarchy.
5.2 Title
Two options:
- Static title — type the text directly (e.g. "Home").
- Localization — click Browse keyword and pick a localization keyword so the title translates per language.
Only Global keywords appear in the menu's keyword picker — by design. A menu can be embedded in any page, layout, or shared element, so the system can't guarantee a page‑specific (Local) keyword would be available wherever the menu is used. Use a Global localization group for menu titles. (See the Localization guide for Global vs. Local.)
5.3 Destination
Where the item links to — four choices:
| Destination | Behaviour |
|---|---|
| Page | Links to a page in this environment. Pick the page; if it's a dynamic page you also pick the data item to target. A Open in new tab checkbox is available. |
| URL | Links to an external address (e.g. https://google.com). Validated as a URL. Has the Open in new tab checkbox too. |
| Fragment | Stays on the current page and jumps to an anchor — adds #<value> (e.g. #test) to the URL. |
| Void | Links nowhere (renders as href="javascript:void(0)"). Useful for a parent item that only opens a submenu. |
5.4 Query parameters
Optionally add key/value pairs that get appended to the link as a query string (e.g. ?user=clod). Add as many rows as needed; remove with the red delete button.
Click Submit to add the item to the tree.
6. Reordering & nesting items
Drag an item by its move handle and drop it onto another item. A Move Menu Item dialog confirms what you intended:
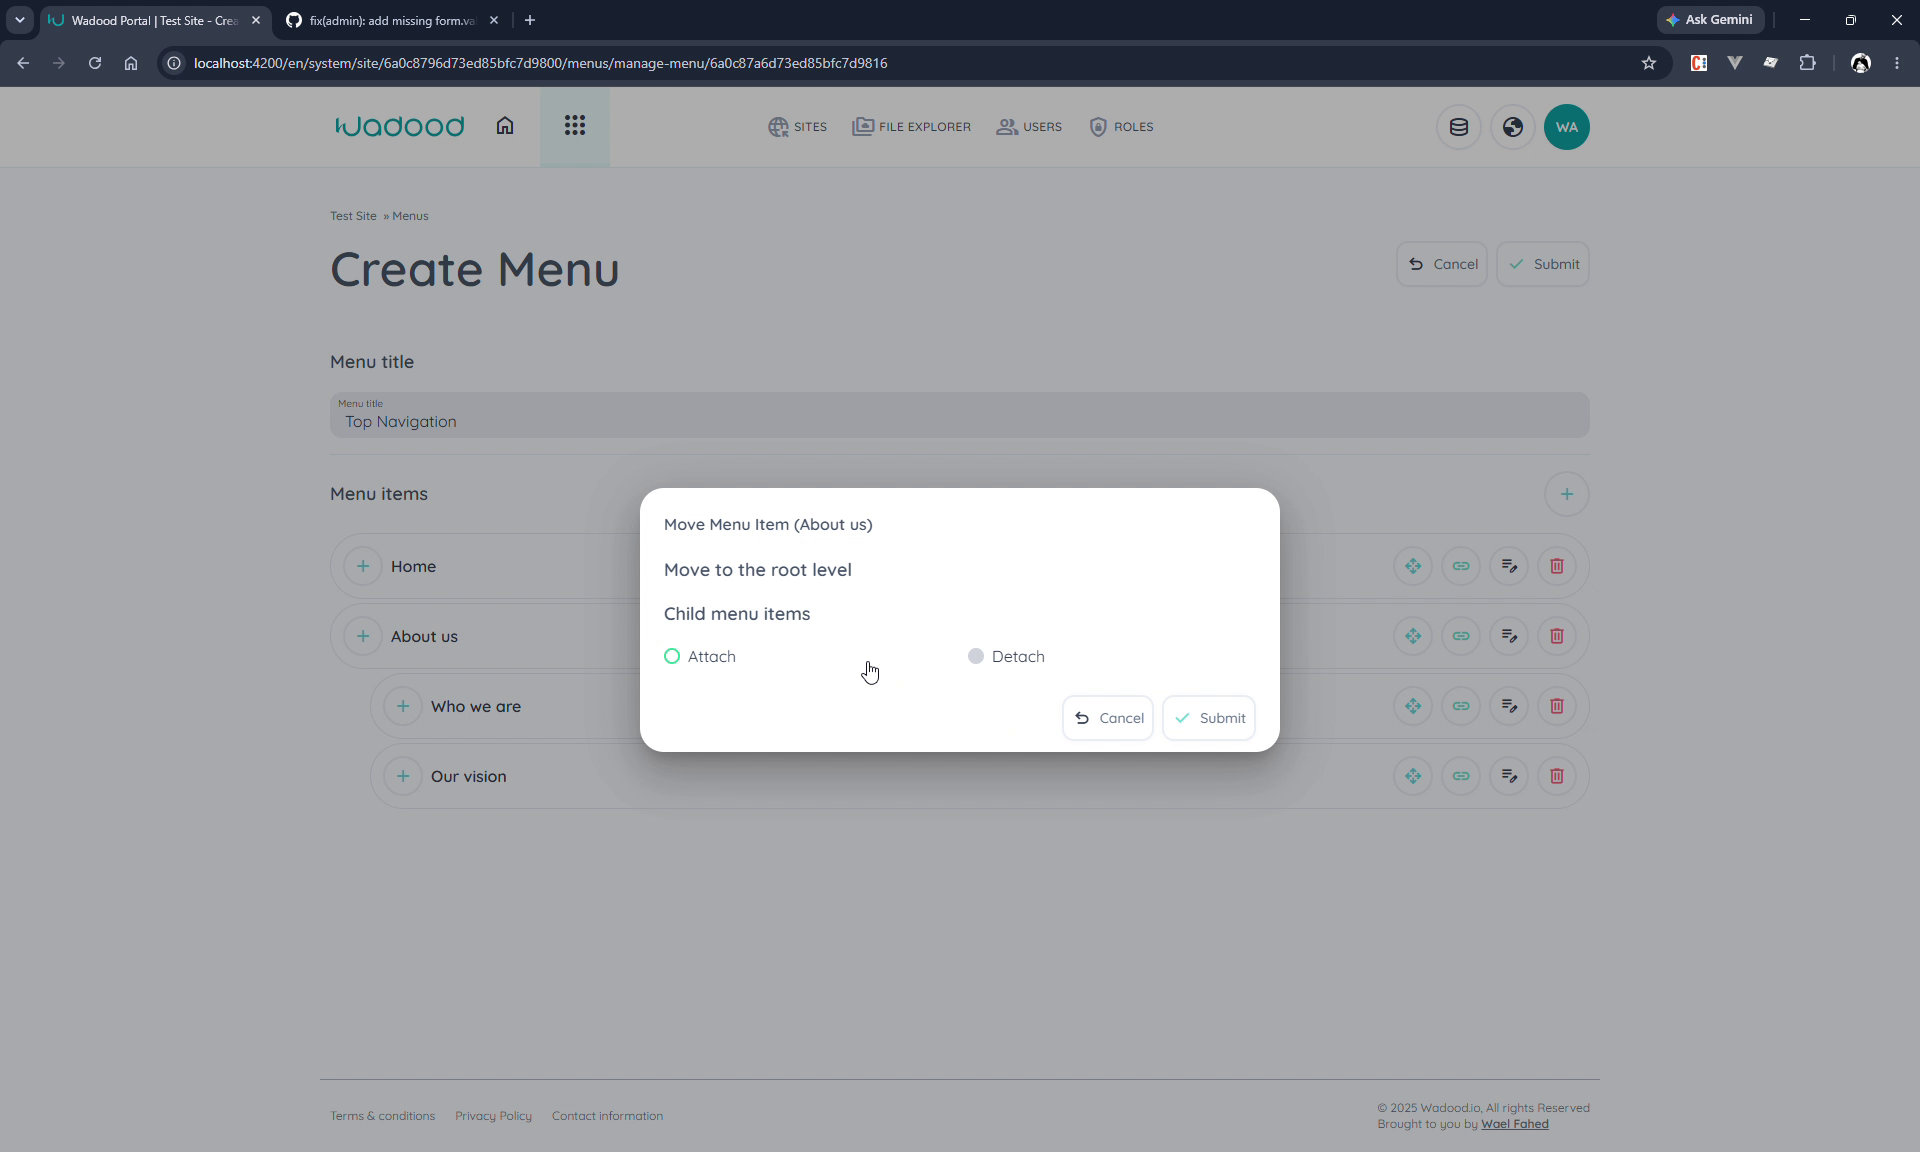
- Target placement — drop next to an item (becomes a sibling) or inside it (becomes a child). Dropping at the top level offers Move to the root level.
- Child menu items — if the item you're moving has children, you choose:
- Attach — the children move along with it (the subtree stays intact).
- Detach — the children stay where they are and are re‑parented to the closest remaining parent (or the root).
Submit to apply the move. Sequences and levels are recalculated automatically.
7. Using a menu on a page
Once saved, a menu is available to the page builder, layouts, and shared elements. In the builder, add a Menu element, open Manage Menu Element → Select Menu, and choose your menu (e.g. "Top Navigation").
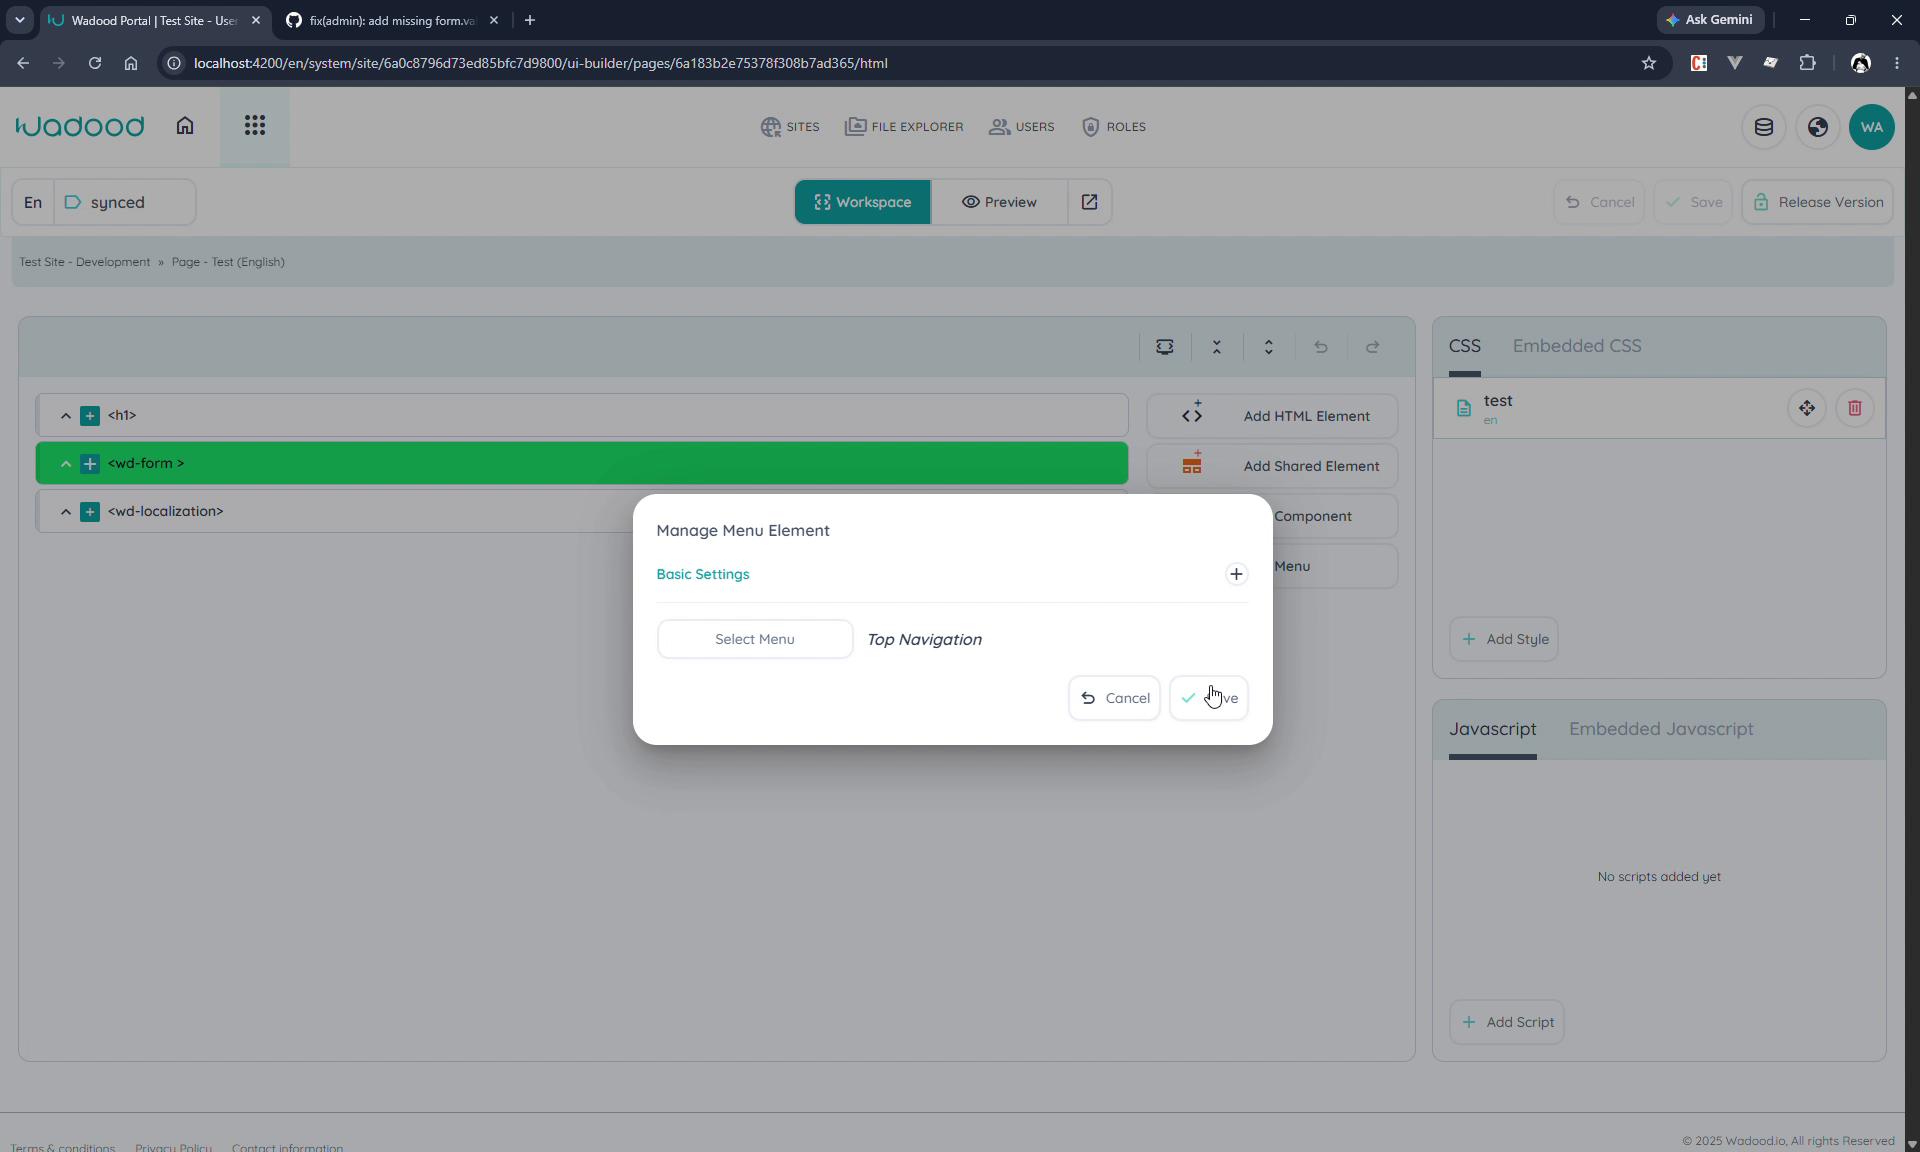
The page then renders the menu's published items with their titles, destinations, and query parameters.
8. Deleting and restoring menus
- Delete moves a menu to the Deleted tab (soft delete) — it can be restored from there.
- Permanent delete (from the Deleted view) removes the menu for good. A menu must be in the Deleted state before it can be permanently removed.
9. Tips & common pitfalls
- Name is for admins, titles are for visitors. The menu name ("Top Navigation") is an internal reference; what visitors read are the item titles.
- Use Void for dropdown parents. A top‑level item that only reveals a submenu should use the Void destination so it doesn't navigate anywhere itself.
- Use Global localization groups for menu titles — Local (page‑scoped) keywords won't show in the menu picker by design.
- Unpublish instead of delete when you want to temporarily hide an item but keep its configuration.
- Dynamic pages need a data item. When linking to a dynamic page, remember to also choose the specific data item the link should resolve to.
- Work in the right environment, then promote with the Sync Manager.
10. Reference: menu‑item fields
| Field | Meaning |
|---|---|
| Parent | The item this one nests under (Root = top level). |
| Title | Static text, or a Global localization keyword. |
| Destination | page / url / fragment / void. |
| Page + Data item | The target page (and, for dynamic pages, the data record). |
| URL | External link target. |
| Fragment | Anchor appended as #value. |
| Open in new tab | Opens the link in a new browser tab (Page/URL). |
| Query parameters | Key/value pairs appended to the link as a query string. |
| Published | Whether the item renders on the site. |